Wednesday 27 February 2019

iTunes Could Not Back Up the iPhone Because the iPhone Disconnected, How to Fix?

iTunes Could Not Back Up the iPhone Because the iPhone Disconnected, How to Fix?

Backing up your iPhone can be time-consuming enough as it is, hence why so many people neglect the task and are left distraught when all their data disappears forever. But, the task can be made even longer if an error continuously pops up and prevents you from completing it. Although, if you do see "iTunes could not back up the iPhone because the iPhone disconnected", there are ways to get around it.


Make Sure the Connection Is Okay


Disable Antivirus Software on Computer


Hard Restart iPhone While Plug It into iTunes


Delete the Old Corrupted Backup


Try These Hopeful Tricks


Backing Up iPhone with an iTunes Alternative
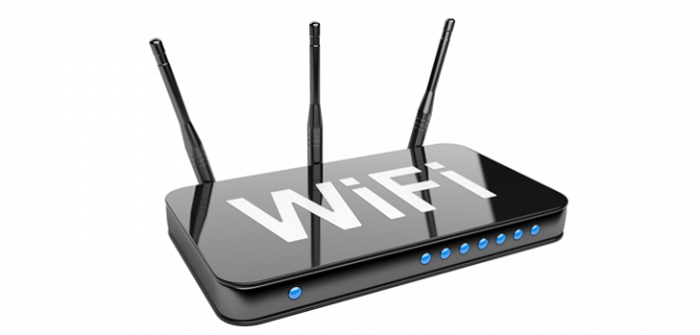
Solution 1: Make Sure the Connection Is Okay

Before trying anything else, you should definitely ensure that the connection is solid. After all, iTunes is literally telling you there's a connection issue. One thing to take note of is always plug the cable into a USB port on your actual computer, not an external hub. Another thing is to thoroughly inspect the wire to look out for any bumps, erosion or cracks. Oh, and an original Apple cable will always be more reliable than a replica.


Solution 2: Disable Antivirus Software on Computer

Whether you've got McAfee, Norton, Avast or Bitdefender as your antivirus software, they all have the potential to hinder the iTunes backup process. Therefore, it may be worth temporarily disabling it whilst you perform the backup. But, remember to turn it back on when you're finished to ensure your computer is protected.Sponsor ads:Change Message/iMessage Background on iPhone with/without Jailbreak


Solution 3: Hard Restart iPhone While Plug It into iTunes

A great option to explore is hard-restarting your iPhone while it is still plugged into your computer. Here are some simple steps that you can follow which may solve your problem:


Have iTunes open while the iPhone is connected.


Hold down the power and home button simultaneously for around 10 seconds.


The iPhone will ask if you trust the computer – enter your password and trust the connection.


This will then allow you to perform a backup.


Solution 4: Delete the Old Corrupted Backup

Sometimes an iTunes backup can randomly become corrupted, which is what may have happened in your situation. Usually, a corrupted backup will cause the new backup to hang rather than quit, but it is still possible. The best way to deal with it is to delete the old one, so that there's nothing in the background preventing a fresh backup. If you want to learn how to delete an iTunes backup, check here for a guide.
Solution 5: Try These Hopeful Tricks

The reason why we say hopeful tricks is because they're last-ditch attempts which you need to cross your fingers for. However, they have been reported to work, so don't be too sceptical.

The first is to disable Wi-Fi and Cellular Data, then begin the backup process.

A second is to turn Airplane Mode on and re-backup the iPhone.


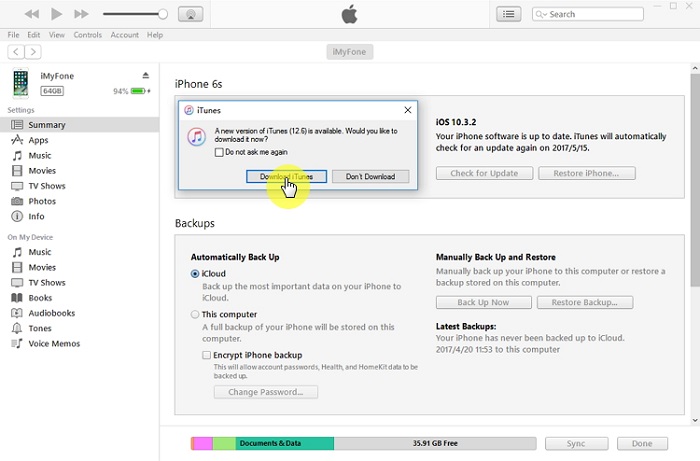
Solution 6: Backing Up iPhone with an iTunes Alternative

Considering it's iTunes that's giving you a hard time, it may be in your best interests to look for an effective alternative to back up your iPhone. We suggest opting for iMyFone D-Port Pro,


Also Read:How to Recover Deleted Photos from iPhone Xs/8/7/SE/6S/6/5S/5C/5/4S
Also Read:How to Duplicate Snapchat on iPhone in 2019 (iOS 12 Supported)
Also Read:Best Free Partition Manager Software for Windows 

Tuesday 26 February 2019

Got iTunes Error 17 When Updating or Restoring iPhone? Full Solutions Offered


Got iTunes Error 17 When Updating or Restoring iPhone? Full Solutions Offered
"Hello! I started updating my iPhone 7 to iOS 11.1 using iTunes and I met an error which says unknown error 17. How to fix this? Please tell me!"


We will tell you some solutions that can be performed when you get stuck with iPhone restore error 17 or iPhone update error 17. There are many people who meet problems during the process of restoring iPhone or updating iPhone to iOS 11.1 and end up with errors like iTunes Error 17 or 3194. Mainly, the error comes because of connectivity problem. Let's move further without delaying much and understand what you can do to fix this unknown error 17 on iTunes.
6 Tips to Fix iTunes Error 17 When Updating or Restoring iPhone
1. Update iTunes to the Latest Version

You may receive the iTunes Error 17 due to the outdated iTunes version. Therefore, it is suggested to check if you have the latest version of iTunes before jumping to any conclusions. Usually iTunes will prompt you if there is a new version released when you open iTunes, but in case you didn't notice that, please check it manually. If it is not the latest version, you need update it first and then try restoring your iPhone. See, if again the iTunes Error 17 comes or it has been removed.


2. Check Security Software or Firewall

The security software or firewall may block the process and gives these kinds of iTunes errors. Check if any security software enabled or firewall is set since they may hinder the process and won't let iTunes to connect with Apple server. Disable or uninstall the security software to get the process done smoothly. See, if now you are getting the trouble or not. If again the restoring process gives error 17, jump to the next fix.


3. Test Network Connection

As we said, iTunes error 17 mostly occurs due to connection issue. After checking above things, the next thing to make sure is checking the internet connection. Make sure the Wi-Fi you are using is stable. If the WiFi router is too hot, wait for a while and restart it.


4. Check Hosts Files

Sometimes, host files are the reason for iTunes error. The solution for this case is to reset the Hosts file on your computer in order to make sure your computer can contact Apple's server.

Windows:

For Windows computers, the steps are various for different Windows version. You can refer to this article "How to reset the Hosts file back to the default" on Microsoft official site.

Mac:


Go to "Finder" and choose "Applications" and then "Utilities".


Open "Terminal" and type the command, "sudo nano /private/etc/hosts" and hit on "Return"


Subsequently, enter the same password you used to sign in to Mac and hit on "Return".


Now, the terminal will present you hosts file.


Then look for the "gs.apple.com" using the arrow keys. If there is no "gs.apple.com", then you can move on to the next solution.


Add the # symbol and a space (like this "# ") to the beginning of the "gs.apple.com" and press Control-O to save it.


Hit "Return" if you are asked for the file name. Then press Control-X.


Now you can restart your Mac and try to restore or updating your iPhone again.
5. Use iMyFone D-Port Pro to Selectively Restore iPhone
Also Read:Top 8 iOS Emulators To Run iOS Apps On Windows PC & Laptop in 2019


Also Read:12 Best Painting & Drawing Apps for iPad and iPad Pro in 2019

Friday 22 February 2019

How to Delete WhatsApp Chat History from iPhone (Recoverable) 2019


How to Delete WhatsApp Chat History from iPhone (Recoverable)

Here is how to delete your WhatsApp chat history the “usual” way from iPhone. Keep in mind that the data will be recoverable with recovery tool, though:


Open WhatsApp on your device.


Go to Settings.


Go to Chats.


Go to the bottom and hit “Delete All Chats.”

However, if you just want to delete specific WhatsApp chat history, directly go to “Chats” when you launch WhatsApp, swipe the chat you want to delete to the left. Click on More button and then Delete Chat. Note that you cannot delete WhatsApp chat history in bulk.Gihosoft Free iPhone Data Recovery:iphonerecovery.com


Are Deleted WhatsApp Chat History Gone Forever?

If you don’t care that someone could use a third-party tool to recover your conversations from your phone, then maybe it is indeed “enough.” However, if you value your privacy and don’t want your private information getting into the wrong hands, then manually deleting your WhatsApp chat history is not enough at all.

Anyone who is even a little bit technically savvy could easily recover your private conversations. If you exchanged any important information, they could even use sensitive information to steal your identity in a worst case scenario. If you are selling your phone, it’s a good idea to wipe it clean.
Can We Delete WhatsApp Chat History from Both Ends

Actually, the answer is NO!

There is no way to delete WhatsApp chat history both from your device and the recipient's device. The WhatsApp chat history are stored in its server. No one besides WhatsApp can access the files in the server. That's why we could not delete data from other side.Sponsor ads:

Gihosoft Free iPhone Data Recovery:iphonerecovery.com

Free iPhone Data Recovery Software for Windows/Mac

Recover up to 12+ types of files, including contacts, SMS, photos, WhatsApp, Viber, notes, etc.

Restore lost data from iOS devices directly or from iTunes and iCloud backup

Recover iPhone data lost due to iOS upgrade/jailbreak, accidental deletion, device lost or broken

Support all the latest iPhone, iPad and iPod Touch

Both Free and Pro version.

If you lost data after you updated to a new iPhone, you can always use Gihosoft iPhone Data Recovery to get the data back from the old iPhone or backup.

Top 10 Best FRP Bypass Tools to Bypass Google Account on Android Device 2019

Worth reading:download youtube 1080p

If you use android phones, please choose Gihosoft Android Data Recovery

Jihosoft Android Data Recovery: the best Android Data Recovery software for Windows and Mac to recover deleted contacts, messages, photos, videos, WhatsApp and etc from Android

iTunes Could Not Back Up the iPhone Because the iPhone Disconnected, How to Fix?

iTunes Could Not Back Up the iPhone Because the iPhone Disconnected, How to Fix? Backing up your iPhone can be time-consuming enough as it...